

March 22, 2021
Categories: Isomalt courses - Techniques - Training - Working with Isomalt

EIn this article, you’ll learn about the stretching and satin-finishing technique, one of the most versatile caramel techniques, and how to do it. Let’s get started.
What is the candy stretching technique?
The drawing technique is one of the three basic techniques for working with caramel, along with the pouring and blowing techniques. Within the drawing technique, we also have the option of satin-finish the caramel. Therefore, we can work with drawn caramel or isomalt sugar, either satin-finish or unfinished.
The stretching technique is the one we apply to work the caramel, when, after cooling the isomalt sugar on the mat (and after having satin-finished it if we want to achieve this effect), we stretch it from the base piece until we form the desired piece.
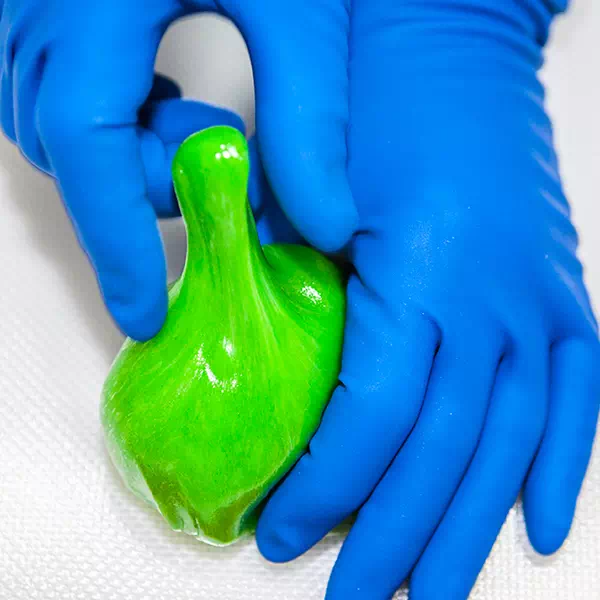
They can be stretched from a petal to form flowers, lollipops, bows in various colors, and a wide variety of different decorations.
In short, this technique is used to stretch isomalt sugar when creating a caramel decoration. We can do this by stretching it from the base piece of caramel, or we can stretch the decoration once we have the cut piece of caramel without needing to stretch it from the base; this is what we would do, for example, with a petal.
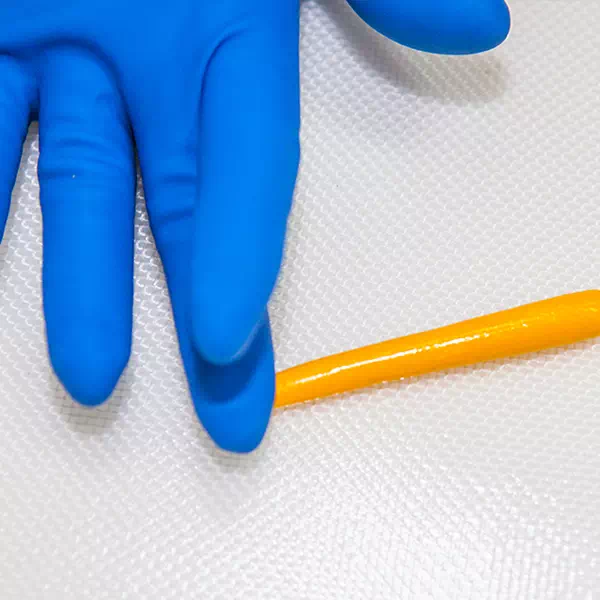
This is an example of stretching a piece of isomalt that has already been cut; unlike the previous example, we will not stretch from the base.
Steps to stretch isomalt
Once the isomalt has been cooked and colored (if desired), it’s time to cool and prepare the caramel so you can start working with it. This video shows how we color isomalt sugar to make it translucent, opaque, or metallic:
How do we know when the caramel is in perfect condition to start stretching?
It’s true that each decoration we make using the stretching technique needs to start at a different temperature, but we have to aim for a consistency similar to modeling clay, fondant, or playdough. The idea is to have the base piece of candy cool enough to handle with your hands, but warm enough so it doesn’t break before you finish decorating.
I know, it sounds difficult when you put it like that, but with practice, you’ll quickly internalize that exact temperature point, and sooner than you think!
The satin caramel
As I explained at the beginning of the article, within the stretching technique we can choose to work with satin-finished or unfinished caramel. Below I share my professional experience with satin-finished isomalt sugar, so you can incorporate it into your working method.
What is caramel satin?
By using the sugar-drawing technique, we incorporate air particles into our caramel, causing it to become opaque and giving it a spectacular shine. This shine acquired by the opaque, drawn-out caramel is what we call satin, or satinizing.
How do we satin isomalt sugar?
Once the caramel has cooled to between 80° and 90°C, take the piece and stretch it out by holding the ends and twisting it. You’ll need to twist it more than 40 times, but don’t count. Just watch as it gradually becomes satiny, and you’ll know when to stop. You’ll stop twisting the caramel when you no longer see any streaks and the satin is uniform.
Important note
You can only glaze caramel that is dyed with a translucent color or is completely undyed. Keep in mind that when you glaze caramel that has already been dyed, the final color will always be much lighter. If you want a stronger glaze, you need to add significantly more dye to the caramel when you glaze it. For example, in the following photo, we started with isomalt sugar dyed red. As you can see, the final result is a bright pink.
Is it possible to remove the satin finish?
A caramel that has been satin-finished will always have that satin finish. Even if you remelt it, you’ll never completely remove all the air trapped in the satin-finished caramel. Therefore, I advise you to keep the leftover caramel as a satin-finished caramel once you’ve finished your decorations and stored it. When you reheat it, you can give it a few turns and stretch it out, and the satin finish will reappear.
Let’s look at some examples.
Example 1: If we apply a satin finish to a candy that we have dyed red, we will obtain a pink satin finish. If we wanted a red satin finish, we would have to dye it almost maroon.
Example 2: If we satin isomalt sugar that we have dyed with a caramel tone, we will get a golden satin, and if we dyed it black, we would get a silver satin.
Example 3: if we do it with an isomalt without any color, we will get a beautiful pearly white.
To give you a clearer idea, I’m sharing a video where you can see how I cool and satinize the isomalt:
And from here, your imagination and desire to create come into play. If you’d like to start practicing, you can buy isomalt sugar in our ingredients and materials shop. I hope this article is helpful.
I LOVE ISOMALT!
Article written by Mayte Rodríguez, a teacher specializing in the art of isomalt sugar and treated caramel.










Leave A Comment